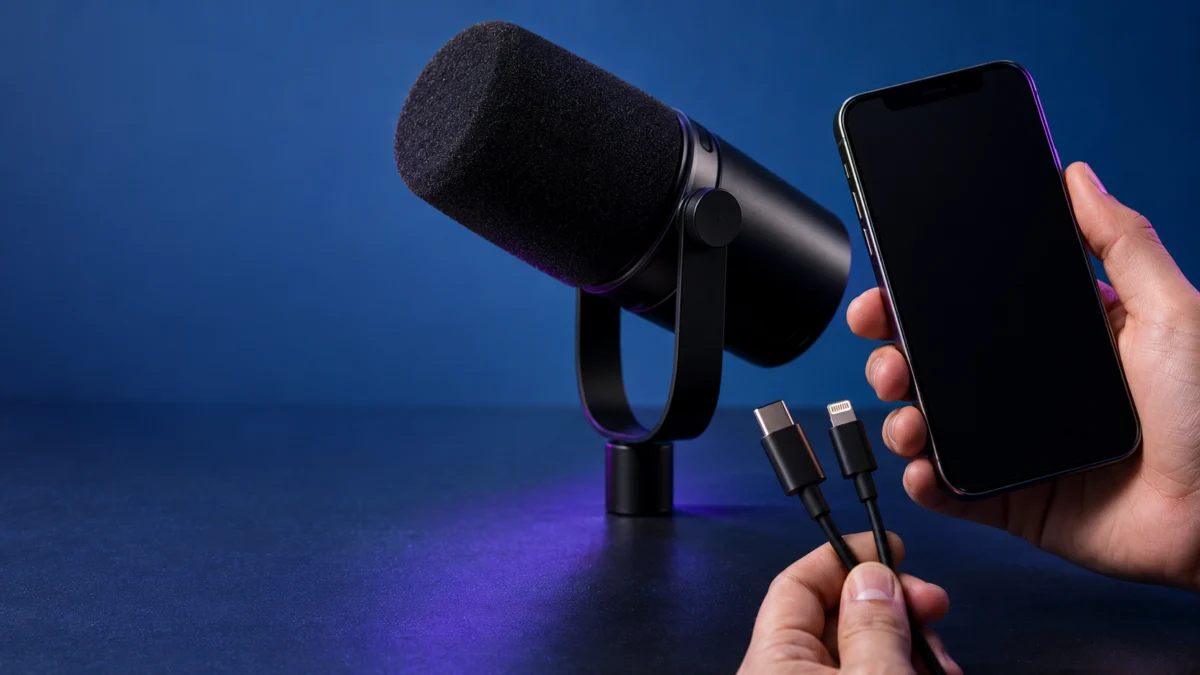
If your Shure MV7+ is not working with a Lightning iPhone, start with the cable that came in the box. The MV7+ ships with a USB-C to USB-C cable only, so it cannot reach a Lightning port without a second cable. Shure’s MV7+ user guide lists a 15-inch USB-C to Lightning cable, AMV-USBC-LTG15, under optional accessories.
From there, treat the problem as four separate states rather than one fault: whether the microphone responds to power, what the LED panel reports about the USB connection, whether your recording app recognizes it, and whether a saved test recording plays back with your voice in it. Each state can pass while the next one fails. A lit panel confirms power, not a suitable cable, so keep the cable in scope until a saved recording plays back correctly.
Quick Checks Before You Buy Anything
Before buying anything, confirm five things you can check for free: that your microphone is an MV7+, that your iPhone uses a Lightning port, which cable you are using, what the LED panel does when you plug in, and whether your recording app has microphone permission.
- Model name. Look for MV7+ on the microphone body. The MV7, MV7X and MV7i are separate products, and accessory advice for them does not transfer.
- iPhone port. Confirm the port is Lightning rather than USB-C. That decides which cable you need.
- Cable in use. Find the model number on the cable or its packaging. Matching connector shapes do not make a cable the right one.
- LED response. Plug in and watch the panel from the moment you connect, not a few seconds later.
- App permission. Check that the app you record in is allowed to use the microphone.
What the MV7+ LED Panel Shows During Setup
The LED panel reports several different things, so read it as a status light rather than a pass or fail. For this problem, the useful indicators are the power-on fade, the brief green that marks a successful USB-C connection, an amber flash at the center after a failed connection, and the red mute ripple.
The panel doubles as a live audio meter and mutes the microphone when touched, so one surface carries status, metering and control.
| What the panel does | What it reports |
|---|---|
| Fades through red, amber and green | Powering on over USB-C |
| Turns green briefly | Connected successfully to a new device over USB-C |
| Center of the panel flashes amber | The USB-C connection failed |
| Red ripples outward from the center | The microphone is muted |
| Flashes red three times when touched | Mute Lock is on, so touch muting is disabled |
| Pulses amber | The firmware is updating |
Two amber states are easy to confuse, and the difference changes what to do. An amber flash at the center is a failed USB-C connection, and reconnecting is the documented response. An amber pulse means a firmware update is running, and Shure’s guidance is to keep the device connected. Do not unplug a microphone that is pulsing amber.
Sliding bars indicate gain or monitor-mix adjustments; custom color modes also change the display. Behavior outside this table is not necessarily a fault.
Check the USB-C-to-Lightning Cable
The MV7+ ships with a USB-C to USB-C cable only, so it cannot reach a Lightning iPhone without a second cable. Shure’s MV7+ user guide lists a 15-inch USB-C to Lightning cable, AMV-USBC-LTG15, under optional accessories. Identify the cable you already have before deciding whether a replacement is the problem.
The connection also has to carry data, not only power. Shure describes the MV7+ as a USB Audio Class 2 device powered through USB-C bus power, and lists iOS 16 or higher as the iOS requirement. A cable has to support a working audio connection, not simply fit both ports, which is why a right-looking cable can leave the microphone dead.
| Cable | Connectors | What Shure lists it for |
|---|---|---|
| Included cable | USB-C to USB-C, 3 m | Supplied with the MV7+. Cannot reach a Lightning port. |
| AMV-USBC-LTG15 | USB-C to Lightning, 15 in | Listed under optional accessories in the MV7+ user guide. |
| AMV-LTG15 | Micro-B to Lightning, 15 in | A replacement cable for the MV7 and MV88+, not the MV7+. |
The last row highlights a model-number trap. AMV-LTG15 and AMV-USBC-LTG15 look similar, but AMV-LTG15 terminates in Micro-B, which the MV7+ does not have. Results for older Shure microphones sit alongside MV7+ results, so check the model number, not the product photo.
Fixory is reader-supported. Some links below are affiliate links, and we may earn a commission if you buy through them. That does not change what the manufacturers list.
If your cable is charge-oriented, unlabelled or unidentifiable, the cable Shure names for the MV7+ is the most direct option. The 15-inch length is suited to placing the phone close to the microphone.

Please check the Amazon product page for the latest price and availability.
For more distance, RØDE describes the SC19 as a 1.5 m MFi-certified USB-C to Lightning cable for connecting MFi-certified USB-C microphones to iOS devices, and notes that it will not charge or sync an iOS device. Shure lists the MV7+ as MFi certified. Those statements line up on specifications, but that is not a tested pairing: in the product pages and user guide we checked directly, we found no statement naming this combination. Treat it as a specification match to verify.

Please check the Amazon product page for the latest price and availability.
What Users Have Reported About MV7+ and Lightning iPhones
According to multiple community reports, two patterns come up repeatedly with MV7+ and Lightning iPhones: cables with the right connector shapes that produced no response at all, and setups where the microphone powered on but the recording still had problems. These are individual reports, not product-wide verdicts.
In the first pattern, users plugged in a cable that fit both ports and got nothing. The exact cable model was often never identified, which is why identifying your own comes before replacing it.
In the second pattern, the microphone powered on normally and the recording was still unusable. One user reported that an adapter setup worked but Facebook did not recognize the microphone during calls. These reports do not establish what works, but they show why a lit panel is a poor place to stop checking.
Seven Checks to Narrow Down the Problem
Follow these seven checks to narrow down the problem. They move from the physical connection to a saved recording, and each one tells you something the previous check could not. Work through them in order, and stop at the first check that fails rather than changing several things at once.
- Confirm the model and the port. Verify the microphone is an MV7+ and the port is Lightning.
- Identify the cable. Check the model number and the connectors at both ends. A Micro-B cable will not fit the MV7+.
- Plug in and read the panel. Watch for the power-on fade, then a brief green or an amber flash at the center. If it flashes amber, reconnect, wake the iPhone, and allow the microphone in settings.
- Open a MOTIV app and select the microphone. Shure’s phone setup steps are to install MOTIV Audio or MOTIV Video, connect over USB-C, and select the microphone in the Device tab.
- Check whether the microphone is muted. If red ripples outward from the center, the MV7+ is muted. Touch the panel to unmute, or unmute from your device.
- Check microphone permission for that app. App-by-app microphone access lives under Settings, then Privacy & Security, then Microphone.
- Record a short test and play it back. Record a few seconds in MOTIV Audio, save it, and play it back. A moving meter is not the same as a file with your voice in it.
Power, Connection, Recognition, and a Saved File Are Different Things
A lit panel confirms that the microphone is drawing power. It does not confirm that the USB connection succeeded, that your app recognized the microphone, or that a file was written. Treat each of those as a separate result, and keep the cable in scope until a saved recording plays back correctly.
| State | What it confirms | Next check | Buy anything? |
|---|---|---|---|
| Panel stays dark | No visible power-on response | Identify the cable, then try another known data cable or another host | Not yet |
| Panel lights, center then flashes amber | Power arrived; the connection did not complete | Reconnect, wake the iPhone, allow the microphone in settings. If it repeats with the same cable, the cable stays a candidate. | Only if the cable is unsuitable or unidentifiable |
| Panel turns green, app does not list the microphone | Connection completed; recognition did not | Reopen the app, check the Device tab and permission | No |
| App lists it, meter does not move | Recognition worked; input is not arriving | Mute state, Mute Lock, gain settings | No |
| Meter moves, saved file has no voice | The meter responded, but the saved recording did not capture your voice | Save a new short recording and play it back | No |
| MOTIV Audio records, another app does not | The recording path works; the issue is app-specific | That app’s permission and its own support | No |
| Same failure with a cable of the listed type | Beyond these general checks | Contact Shure Support with the model, iPhone, cable and app | Not the microphone yet |
Muting and Mute Lock are not the same setting. Muting stops the microphone’s audio, and the panel ripples red outward from the center. Mute Lock is narrower: it disables touch muting, so the panel flashes red three times when touched. Shure’s guide points to MOTIV Mix, the desktop app, for turning it off. Separately, the mute state does not persist through a power cycle and clears when the MV7+ restarts or is reconnected.
The certification section of the MV7+ user guide names Lightning iPhones up to the iPhone 12 series and the iPhone SE (2nd generation). That records the devices named there; it is not written as a statement that other Lightning iPhones are excluded. If yours is not listed, treat it as a reason to check with Shure Support rather than a verdict.
How We Researched
This article is based on manufacturer documentation, official support materials, and community reports where available. We have not conducted hands-on lab testing. The MV7+ specifications, LED behavior, accessory listings, mute behavior, iOS requirement and setup steps come from the Shure MV7+ product page and user guide, and the cable specifications from the Shure and RØDE pages named above, all of which we opened directly. Community reports are identified as such, not treated as compatibility confirmations. Sources we could not open directly are not the basis for any claim here.
Frequently Asked Questions
Can I use the cable that came with the MV7+ on a Lightning iPhone?
No. Shure lists the supplied cable as a 3 m USB-C to USB-C cable, which has no Lightning connector. A Lightning iPhone needs a separate cable.
Is the Shure AMV-LTG15 the right cable for an MV7+?
No. Shure lists AMV-LTG15 as a Micro-B to Lightning cable for the MV7 and MV88+. The MV7+ uses USB-C, and the cable listed under its optional accessories is AMV-USBC-LTG15.
Do I need a firmware update to use the MV7+ with an iPhone?
In the official material we checked, no minimum firmware version is stated for Lightning iPhone connections, so we would not treat one as a requirement. While the panel pulses amber during an update, leave the microphone connected.
The Short Version
The MV7+ does not include a cable that reaches a Lightning port, and Shure lists AMV-USBC-LTG15 as its optional USB-C to Lightning cable. Identify the cable you have before buying a replacement, and watch for the similarly named AMV-LTG15, a Micro-B cable for older models.
After that, stop reading the LED panel as a single verdict. Power, a completed USB connection, recognition in the app, and a saved file that plays back are four separate results, and the cable stays a candidate until the last one passes. If a cable of the listed type still fails, contact Shure Support before replacing anything.