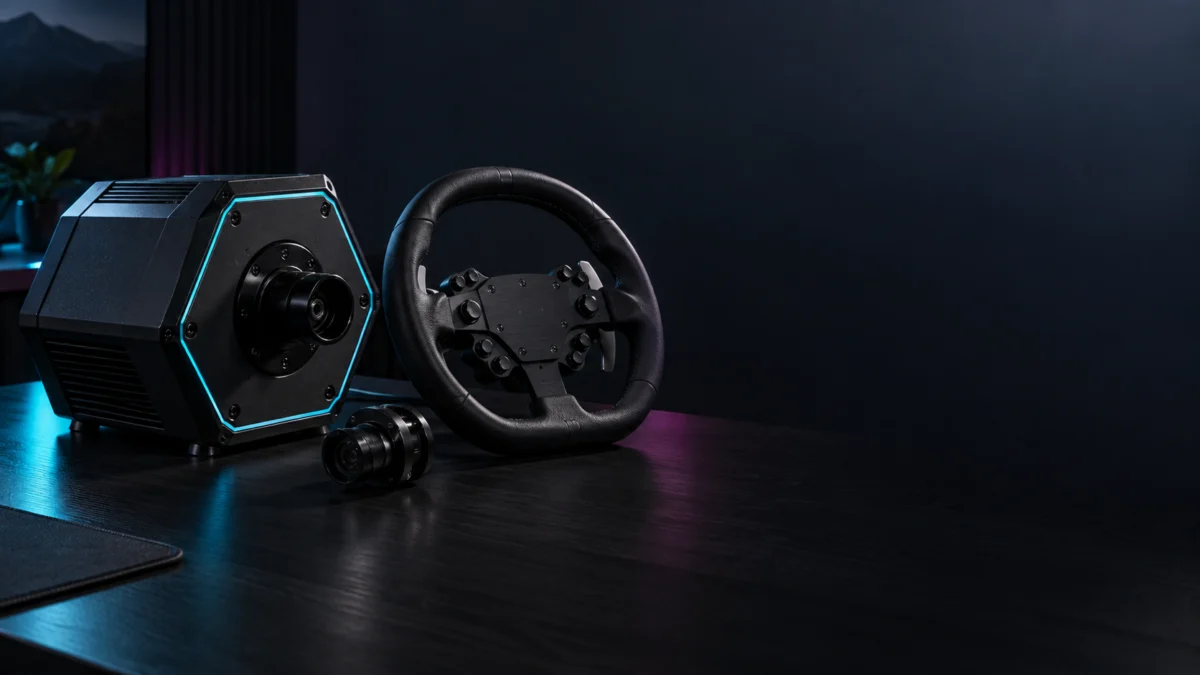
If your Thrustmaster T818 base powers on and appears on your Windows PC but the wheel rim or its buttons do not, start by checking the rim interface and component firmware. Start with three free checks: power the base off before touching the rim, confirm how your exact rim attaches to the T818, and, if you use the older Quick Release Adapter, make sure its clamp ring is fully tightened. Thrustmaster’s adapter manual says the wheel may not be detected in the Control Panel, or may not work in games, when the clamp ring has not been fully tightened. Then check firmware in My Thrustmaster Panel, because a base update also covers the adapter while several newer rims need their own update.
This guide is for PC owners whose T818 base is already visible. It does not cover a base that never shows up, console use, force feedback tuning or third-party rims.
Which T818 Problem Do You Actually Have?
Sort the symptom before changing anything. A missing base points to power, USB or drivers and is outside this guide. A visible base with a missing rim points to how the rim is attached or to its firmware. If the rim’s inputs work in My Thrustmaster Panel but fail in one game, check that game’s input setup first.
| What you see | Most likely layer | Where to go |
|---|---|---|
| The T818 base itself is not listed in My Thrustmaster Panel | Base power, USB or driver | Outside this guide; start from the official T818 support page |
| Base listed, rim or buttons missing, older rim on the Quick Release Adapter | Adapter direction, clamp ring, screw or pins | Steps 1, 3 and 4 |
| Base listed, rim missing, Ferrari 488 GT3 or EVO Racing Hub | Latch-base holder not mounted, or rim firmware | Steps 2 and 5 |
| Base listed, rim missing, native latch rim such as the Hypercar | Latch seating or rim firmware | Steps 1, 4 and 5 |
| Buttons respond in the app’s TESTING screen but not in one game | That game’s controller setup | Step 6 |
| Adapter will not seat without force, or a pin looks bent | Incorrect fit or possible physical damage | Stop and contact Thrustmaster support |
Quick Fix Checklist
- Switch the base off with its On/off button before every rim change.
- Identify your exact rim and whether it is native latch, dual-system or screw-base.
- For screw-base rims on the Quick Release Adapter, recheck insertion direction, clamp ring and screw.
- For a Ferrari 488 GT3 or EVO Racing Hub, confirm the supplied latch-base holder is mounted.
- Open My Thrustmaster Panel and look for update notices on the base and the rim.
- Use the TESTING screen before blaming a game.
Why Does the T818 See the Base but Not the Rim?
The T818 accepts rims through more than one attachment path, and each has its own failure points. Older screw-base rims connect through the Quick Release Adapter, whose clamp ring and pins must be seated correctly. Newer latch-base rims connect natively or through a supplied holder, and several of them need wheel-rim firmware that is separate from the base firmware.
According to Thrustmaster’s compatibility article, rims with a native Quick Release system for screw base need the Quick Release Adapter. The adapter manual describes it as the part that bridges Thrustmaster rims launched before 2023 to the T818’s fast release system.
| Attachment path | Examples from Thrustmaster’s list | What to check |
|---|---|---|
| Native latch rim | Hypercar Wheel Add-On, SportCar Steering Wheel, Formula Wheel Add-On Ferrari SF-25 Edition, GT Wheel Add-On | Lever fully lowered; Hypercar rim firmware |
| Rim supplied with two quick release systems | Ferrari 488 GT3 Wheel Add-On, EVO Racing Hub (Evo Racing 32R / 31U Leather) | The holder for latch base must be mounted; 488 GT3 and EVO Racing 32 rim firmware |
| Screw-base rim on the Quick Release Adapter | TM Open Wheel, TM Leather 28 GT, Sparco R383 and P310 Mods, Ferrari SF1000, Ferrari F1, T300 RS, T-GT, TX and T500 wheels | Insertion direction, clamp ring, screw and pins |
| Screw-base rim converted with the Quick Release Upgrade | Separate Upgrade list (the SF1000 has its own Upgrade version) | Follow the Upgrade’s own documentation, not the adapter steps |
For context, PC Perspective’s reviewer, who bought a T818 and used it for two years, describes two routes for older rims: a screw-on adapter or a replacement hub. That is one owner’s long-term view, not evidence of how often detection fails.
How Do You Fix a T818 Rim That Isn’t Recognized?
The fix takes 6 steps. Work from the safest physical checks to firmware, and only then to game settings. Power the base off before every rim change, match your rim to its attachment path, reseat a legacy adapter, confirm detection in My Thrustmaster Panel, apply any base or rim firmware it offers, and finally check the game’s own controller setup.
- Power off the base first. Thrustmaster’s manual says to power off the base with its On/off button before attaching or changing a rim. Repeat this before every step below that involves handling the rim.
- Confirm your rim’s attachment path. Find your exact rim in the compatibility list. If it is a Ferrari 488 GT3 Wheel Add-On or an EVO Racing Hub, check that the Quick release holder for latch base supplied in the box is mounted. If it is a native latch rim, skip the adapter steps entirely. If it was converted with the Quick Release Upgrade, follow that product’s own compatibility list.
- Reseat the Quick Release Adapter (legacy rims only). Handle the adapter carefully: the manual warns that damaged pins can render the wheel unusable. Look at the pins without bending or straightening them, and never force the parts together. Then work through the manual’s mounting order:
- Insert the adapter into the rim’s connector and respect the insertion direction shown by the arrows, so the connectors are not damaged.
- Fully tighten the clamp ring.
- Tighten the screw using an appropriate Phillips head screwdriver (not included). The manual gives no torque figure, so we do not suggest one.
- Make sure the base’s locking lever is open, insert the wheel, then lower the lever. Keep your fingers out of the locking system while you lower it.
An incompletely tightened ring is a documented possible cause, not a guaranteed fix.
- Power on and check in My Thrustmaster Panel. According to Thrustmaster, My Thrustmaster Panel is the app for the T818 on Windows 10/11 or later. Switch the base on, wait a few seconds and open the app. The current T818 no longer auto-calibrates at startup, so a wheel that does not move when powered on is not a fault by itself. Open TESTING and press each button and turn the rim.
- Apply the firmware the app offers. Follow Thrustmaster’s official update article:
- Check that the green Connected indicator appears at the bottom of the racing wheel tab.
- A red NEW UPDATE AVAILABLE message on the base icon means an update is waiting. Click the icon, then click APPLY UPDATES.
- Follow the on-screen Boot Mode visual for your model. The base stays dark in Boot Mode, with no LEDs or screen lit, which Thrustmaster says is normal.
- Do not unplug the wheel during the update, and restart it when the app prompts you.
Per the T818 support page, updating the base automatically updates the Quick Release Adapter firmware. The Ferrari 488 GT3, EVO Racing 32 and Hypercar rims need their own wheel-rim firmware update to work properly with the T818. Compare the versions shown in the upper-right corner of the app’s tab with the current notes on that page instead of a version number copied from an older article. The Ferrari SF1000 uses a separate procedure linked from Thrustmaster’s update help center. Rim firmware updates through My Thrustmaster Panel are meant only for Direct Drive bases; Thrustmaster warns they can make a rim unrecognized on an older force feedback base, and the change may be irreversible.
- If only one game fails, check that game. If the buttons respond in TESTING but not in one title, the rim is reaching Windows, so look at that game’s wheel profile and button assignments. On a legacy adapter, recheck Step 3 first, because the manual links an untightened ring to games not working as well as to missing detection.
How Do You Confirm the Fix, and When Should You Stop?
After a full power cycle, check that My Thrustmaster Panel recognizes the rim and its inputs respond in TESTING. Then check the affected controls in your game. If the adapter will not seat without force, a pin looks bent, or the rim stays missing after correct seating and current firmware, stop and contact Thrustmaster support rather than attempting a repair.
- Swap test, only with what you own. If you already have another rim that is compatible with your T818, power off, fit it, and check it in TESTING. A working second rim points toward the first rim or its adapter; a second failure points toward the base side. This narrows the fault but does not prove it.
- Do not buy a rim to diagnose. Purchasing an expensive rim just to run a swap test is not worth it when support can assess the fault.
- Do not open housings or pry parts. Physical repair is outside the free checks in this guide.
- Contact support. Use the contact option on the T818 support page and describe your exact rim, attachment path and what TESTING shows.
Should You Replace the Whole T818 Setup?
Usually not. Check adapter seating, the supplied holder and available firmware before buying anything. An isolated adapter or rim fault calls for support or a compatible part, not a new base. A full bundle only makes sense if you need a complete PC replacement setup after the free checks and support options are exhausted.
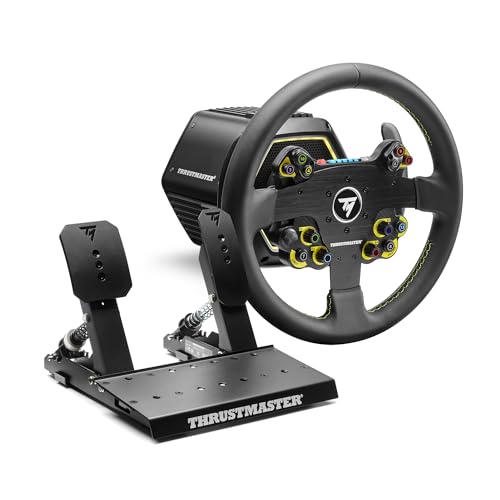
The Amazon US listing for the Thrustmaster T818 EVO 32R Direct Drive Racing Wheel with Pedal Set – PC describes a complete pack with a force feedback base, wheel rim and pedal set: a T818 base, an EVO Racing 32R Leather rim and Raceline Pedals LTE. The listing states compatibility with PC (Windows 10/11) only. It is not a replacement adapter and not a rim-only purchase.
The T818 sits in the premium tier rather than at the very top. PC Gamer’s review calls it a middle-of-the-road option that costs noticeably more than Fanatec’s CSL DD base, and values that Thrustmaster lets you build a setup piece by piece. That review compared the base alone, not this bundle.
Consider the bundle if:
- You need a complete PC setup, including base, rim and pedals, after support or repair options are exhausted.
- You want to stay in Thrustmaster’s ecosystem and play on Windows 10/11.
Skip it if:
- Only the adapter, holder or one rim is the problem.
- Your base still works and you have not finished the free checks above.
- You need console support.
Please check the Amazon product page for the latest price and availability.
How We Researched
This article is based on Thrustmaster’s Quick Release Adapter manual (English section), its compatibility article, its update help center and firmware update article, and the official T818 support page. For context we also used two published reviews: PC Perspective’s long-term review by an owner who bought the base, and PC Gamer’s review. We have not conducted hands-on lab testing, and we found no confirmed multi-thread community reports to include. Specs and compatibility claims are attributed to official sources; review observations are labeled as such.
FAQ
How tight should the Quick Release Adapter clamp ring be?
Thrustmaster’s manual says to fully tighten the ring and then tighten the screw with a Phillips screwdriver, but it gives no torque value. Power the base off first, and stop if the parts only fit with force.
Do native T818 rims use the Quick Release Adapter?
No. Native latch rims attach directly, and the Ferrari 488 GT3 and EVO Racing Hub use the latch-base holder supplied in their box. The clamp-ring steps apply only to screw-base rims on the adapter.
Does a base firmware update also update my rim?
It updates the Quick Release Adapter firmware, not the rim itself. The Ferrari 488 GT3, EVO Racing 32 and Hypercar rims have separate firmware in My Thrustmaster Panel, and the SF1000 has its own procedure.
Why does my rim work in TESTING but not in one game?
If TESTING shows every input, the rim is reaching Windows, so check that game’s wheel profile and button assignments. On a legacy adapter, recheck the clamp ring first, since the manual links it to in-game problems too.
Conclusion
When the T818 base is visible but the rim is not, treat it as a rim-interface and firmware problem first. Power off before every rim change, match the rim to its attachment path, fully tighten a legacy adapter’s clamp ring, then apply base and rim firmware in My Thrustmaster Panel. If parts need force, a pin looks bent, or the rim stays missing, contact Thrustmaster support before buying anything.